Here are a few tips when creating map images from an ArcMap project.
First, please include in any map proper cartographic elements: North arrow, scale bar, scale text, legend, title, study area location, and map source informatoin are all helpful to the final user.
ArcMap supports many image types, I won't get into most of them. I will tell you what has worked the best for me. Most people want a map image to include within a word document or for inclusion within a PDF file.
Export a map image from ArcMap.
1) Toggle to the layout view if you haven't done so already.

2) On the menubar, click File-Export map. The Export Map dialog will appear.
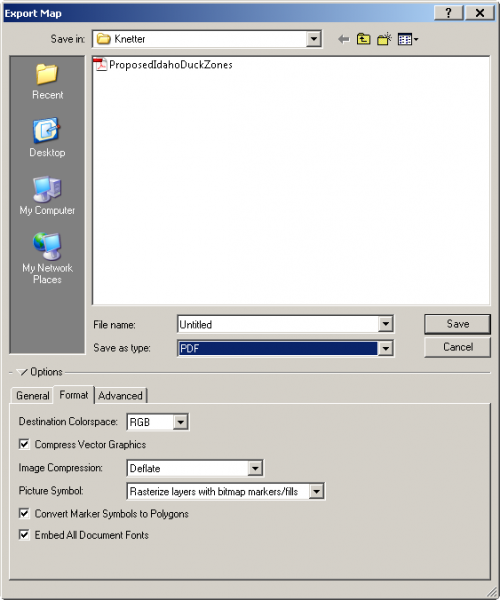
Several files types are available. Many are better in resolution than others. My favorites are PDF, JPEG, and PDF.

Here are some quick guidelines when saving files. Test this for yourself to ensure the best resolution for your mapping purpose.
JPEG, set resolution to at least 400 dpi. These file types can be inserted into MSWord, MSPowerpoint, and other applications.
PNG, set resolution to at least 200 dpi. These file types can be inserted into MSWord, MSPowerpoint, and other applications. I often like them better than JPEG since they usually end up smaller in size and have a better resolution. These images are also great for websites.
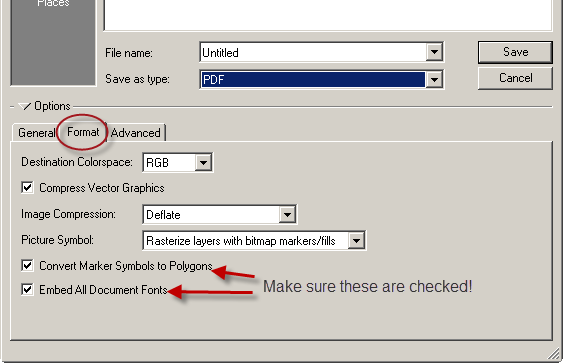
PDF, set resolution to around 150 dpi. These can't be inserted into MS applications, but are great for including within already created PDF documents. Please note the following when creating a PDF file. Make sure to check the options 'convert marker symbols to polygons' and 'embed all document fonts' within the Format tab. If these are not checked, and you send a PDF to a person who doesn't have an ESRI product they will see numbers instead of dots, and odd looking fonts. They will think you created a crazy, unreadable map!