You will have already completed these first two steps to view this blog, but here is the complete process, start to finish.
Type this URL into the address bar of your browser - https://idfg.idaho.gov - and click enter.
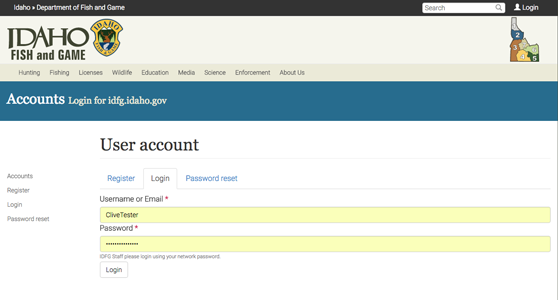
In the upper right hand corner of the page that displays, click the Log-in tab. On the Accounts page, enter your username and password. Click Log-in to enter the next page.
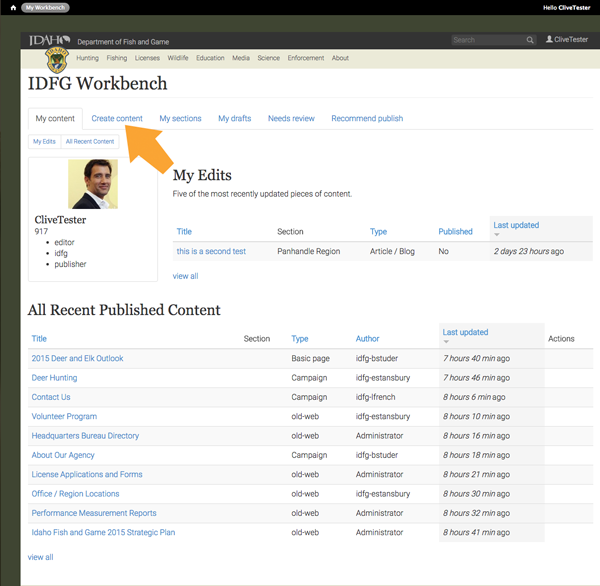
You should see a page that looks like this, click on the My Workbench tab in the upper left corner. Note the "Hello Username" in the upper right corner.

The page that follows displays your unpublished drafts and items that need review or are published. You can see them by toggling back and forth through the tabs. Click on the Create Content tab.
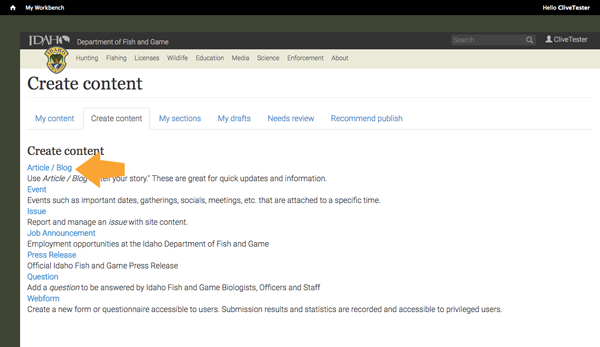
You should see a page that lists various content types, from Articles to Webforms, with a short description following each type. Select Articles/Blogs.
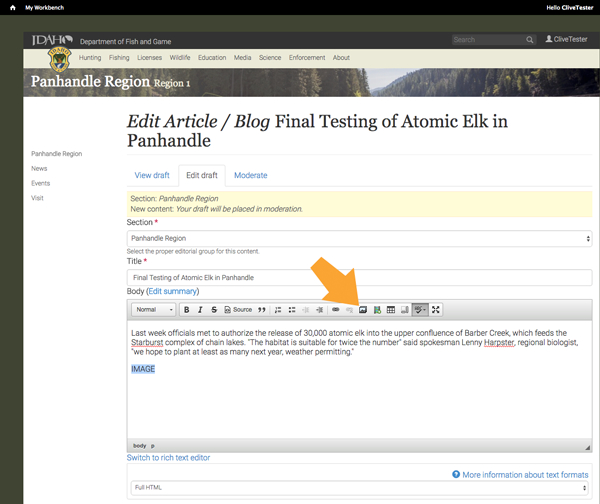
Create your Article by filling in the fields on this next page. Be sure to enter values for any field with a red asterisk. Make sure your title is short and to the point.
When you enter your story, you can use the word "IMAGE" as a placeholder where you may have an illustration, then highlight that word to be replaced when you upload the image. To do that, click on the "add media" icon.
A pop-up window will appear and you can browse your desktop for your image or select one from the library tab in the upper right.

Choose an image file and click Next to take you to the next page in the upload process.
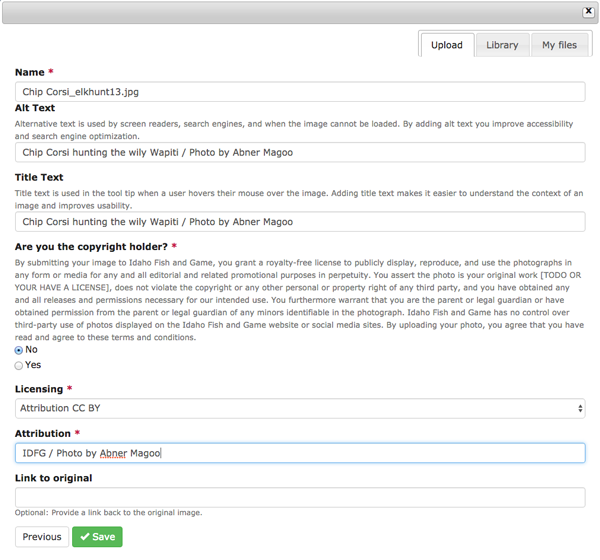
Add a descriptive caption in the Alt field and " / Photo by xxx xxxxx" after the caption. It is almost always a good idea to credit the photographer if possible. Then copy the Alt field and paste it into the Title field. The same information displays in two different ways.
If you took the Photograph, check yes under the Heading: Are you the Copyright holder?
Do not upload photos without express permission from the copyright owner. It is safest to upload only your own images or those of the people you work with. Also remember that photos taken during a work day with company equipment belong to IDFG, credit accordingly.
Under Licensing, select the appropriate category, most of the time it will be "Attribution CC BY."
Finally under Attribution, enter the photographer's name and "for IDFG" if applicable.
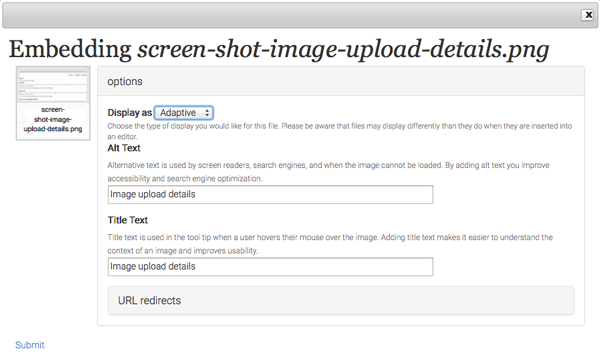
In the next window, select Display as: Adaptive and click submit in the lower left.
Be sure to leave a full space above and below your illustration.
You can add a cover or banner image and a thumbnail image through the same browsing procedure, the upload process is the same. If you like, you could choose your banner image from the Library to also be your thumbnail image.
Fill out as many of the optional tags as you can but don't get bogged down if you don't have the data requested, move on to Save the page.
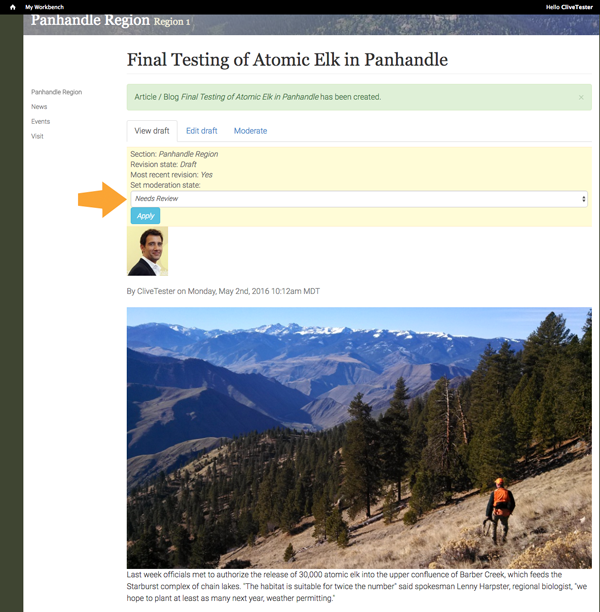
On the last page, if your draft is ready for review, select Needs Review in the dropdown and click Apply. The review process will begin.
